Recommendations for the
Beginning Builder and Pilot


The following article is reprinted from the June 1997 FlightLine.

RCMA Recommended Equipment

by Jim Doty

The RCMA flight training staff have been receiving a lot of questions about what equipment is best for a beginner. They asked me to write an article for the FlightLine listing the best aircraft, radio, and engine for the beginner.

Before I start listing the recommendations, it's important to note here that the listed items are not the only choices for the first time flyer, and that RCMA does not require a new flying student to have any particular hardware to receive flight training.

The items listed in this article have been utilized by many new students with great success, and the instructors have a lot of experience with the setup and maintenance of these choices. As I list the items, I will try to point out their important features so that if you decide to select an alternate vendor, that you can pick an alternative with most of the same good properties.

The Aircraft: The selection of model depends on your experience and in how much time you want to put into the assembly. The following are rough categories into which most models will fall:

  1. Ready to fly (RTF) -- These models are fully assembled and may even have the radio gear and engine installed. Watch out for what they may not include, such as "ready to fly except for engine and radio", which is not quite ready to fly.

  2. Almost ready to fly (ARF) -- ARFs are very common, and are a quick way to get started, or a quick way to recover from a catastrophic crash mid-season. The kits usually contain already assembled and covered fuselage, tail, and wing sections. Most also contain nearly all the needed hardware, so that all you need to buy are a radio, engine, and the glue to put it all together. There are a number of good trainer version ARFs available at a reasonable cost. Although all the parts are included, there is still some assembly required such as putting the wing halves together, attaching the tail surface, and installing the control surfaces. But many of the ARFs have very good instructions.

  3. Ready to Cover (RTC) -- RTCs are often just ARFs without the covering added. They are a good choice if you want the quick assembly of the ARF, but want to add your own style of covering and decoration. Usually you don't save much money because the covering materials you need to add often cost more than the cost differential between ARF and RTC. One advantage in a RTC is that no one at the field will have a plane that looks quite like yours, and if you get a hole poked in your wing covering you can get matching material to patch it.

  4. Kits -- There is a wide range in what can be called a kit. Kits can range from not much more than a box of balsa and a single sheet drawing, to a carefully engineered assembly package with a detailed instruction book with many illustrations and photos, precut parts, and all the hardware you need including fuel tank, servo linkages, and landing gear and wheels. The best of the kits are a great way for a first-time modeler to start. Even the best of the ARFs just don't seem to fly as well as a carefully constructed and well-designed kit (although they are getting close).

  5. Scratch Built from Plans -- You can order plans from magazines and other sources, and then build a model from scratch. This should not be considered for the first-time modeler (unless they get a lot of help from an experienced modeler). Often the plans are too vague to be clearly understood by a novice, and it may be difficult to select proper materials. And unless you get a really good deal on balsa you can easily pay more for the materials than the cost of a kit.

  6. Scratch Build from Your Own Design -- Obviously only the most experienced modelers can successfully design their own aircraft. With a conservative design, and some pilfering of tricks from other model designs, an experienced modeler can often be successful, but a novice doesn't have much of a chance.
There are several good ARFs currently on the market. Several of the trainer ARFs have been built by RCMA members. If you think you want to start off with an ARF, ask around the club and you'll probably find someone with some experience with it. As far as I've seen, most of the popular ARFs are at least adequate, and none are so distinctively better that I want to recommend one above the others. I think the club needs a little more experience with the various ARFs to select the best one for training.

In the case of kits, the situation is different. Many members have built the Sig Kadet LT-40 with good results. The LT-40 is an easy to fly trainer with predictable performance, but it is still agile enough for training introductory acrobatics like loops rolls and stalls. Overall the performance of the LT-40 makes it a good choice for the first time pilot.


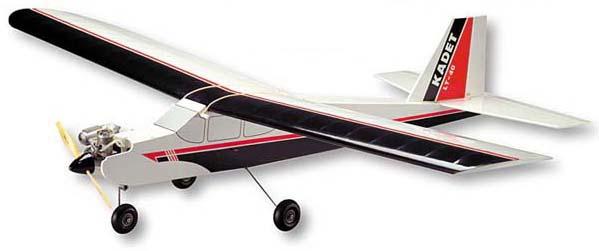
However, where the kit really stands out, is in its documentation and ease of assembly. The kit comes with a fully illustrated assembly manual with many tips that ease the assembly process. The construction is simple and rugged making it go together quickly. The kit also includes nearly everything you need to get started, like fuel tank, landing gear, and control rods. All you will need to complete the plane is radio gear and an engine.

Several builders that started with the LT-40, have told me they were glad that it was their first plane, and that they used the instructions and examples in the LT-40 kit to help them understand the instructions and drawings in the later models they built. Building the LT-40 is about as close as you get to taking a course in building model airplanes.

The combination of ease of assembly, excellent instructions, and great flying characteristics make the LT-40 the recommended plane for any first-time builder/flyer.

The Engine: The LT-40 calls for a 40 to 45 sized engine. On the RCMA grass field, you want plenty of power to get out of the tall grass. So a 45 or 46 sized engine is what you need. Once you are airborne, you can always throttle back for slower flight, but when you're trying to take-off and you pull up too hard, you'll be glad for all the power you can get to keep you from stalling.

You will want an engine that is easy to start, easy to tune, and that provides reliable power, and is rugged. Several of the higher end engines will meet these requirements, but watch out for the low-end 40's. Some of the low-priced motors can really give you trouble, and make flight training a real pain.

The engine that the RCMA recommends is the Super Tiger 45. We have a lot of good experience this engine, and its combination of rugged design, good performance, reliability, and ease of tuning, make it a good bet for any first time modeler. This engine had been slightly more expensive than many of the other engines, but recently prices have fallen, making this engine a real value.


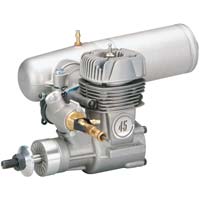
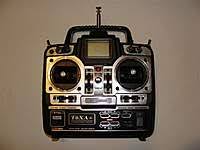
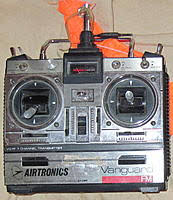
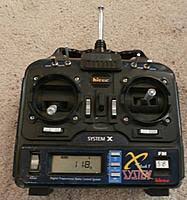
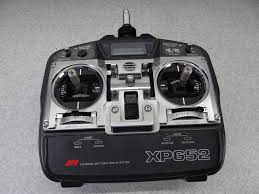
Because there are so many members with these engines (the club trainers even use these engines), the flight training crew knows how to set these up. So after you get your Super Tiger 45 installed, bring it out to the field and they can set it up for best performance and proper break-in.

The Radio: Trainers like the LT-40 only need four channels to control the throttle, elevator, rudder, and ailerons. But you may soon find that a low-cost four channel radio is not adequate for your flight training. There are several features that are very helpful in flight training that just aren't available in the four channel systems. To get the features you need, you will probably need to buy a six or seven channel system.

Some features you will want are:
  1. Servo Reversing -- The transmitter has a switch or is programmable to select which way the servo moves when the stick is moved in a given direction. In the old days you had to remount your servos or rewire them if the direction of throw was wrong.

  2. Dual Rates -- The travel of the servo can be reduced by throwing a switch while you are flying. This lets you (or the instructor) take-off or land with high servo authority, but still fly around with small servos throws to prevent over controlling. This is a big help in training a new student.

  3. Trainer Cord Capability -- This means that the transmitter has a connector (usually on the lower part of the transmitter) that lets it be connected to another transmitter using a trainer cable. Transmitters can only be connected to transmitters made by the same manufacturers. With the training cord connecting two transmitters, the instructor holds the master transmitter which sends signals to the airplane. As long as the instructor presses the training button (on the master transmitter) the student has control of the airplane (using the slave transmitter). If the student gets into trouble, or is done flying, the instructor releases the button and regains control of the airplane.
Because the transmitters must be from the same manufacturer to use the trainer cord, it is handy to have the same type of transmitter as your instructor. However, most flight training can be done without the trainer cord by simply handing the transmitter back and forth between the instructor and student. Because of the complexity of setting up the trim and throw of the second transmitter, training cords are often not used even when the transmitters are compatible. So this should not be the main criteria used in the radio selection process.

The computer radios generally have a few more features and cost a little more. Some of these computer radios have exponential rates. This is a nice feature which provides low sensitivity to small stick movements, but larger sensitivity to large motions. This can really come in handy for latter aerobatics training. It provides the high throws required for aerobatics, but keeps the mid-stick sensitivity down to reduce over controlling in normal maneuvers.

The following radios are good baseline recommendations for your first system. All have the servo reversing and dual rate features which are most desirable for flight training. They also retain their usefulness as your skills increase:


Futaba T6XAS


Airtronics VG6DRFM


Hitec Flash 5 "System X


JR XP652

Often the choice of a manufacturer is driven by more subjective criteria such as the feel of the sticks and the shape of the transmitter. Any of the five or six channel transmitters listed above should be a good starter transmitter. There are higher priced radios with more features, all the knobs and switches on some of these can be confusing to a new pilot, so care should be taken if these are selected. On most of the high-end systems, all the unused switches and buttons can be disabled for the beginning pilot.

With whichever radio you select, the above set of equipment should be an excellent start for the first-time modeler.

James H. Doty, FlightLine Editor


RCMA Recommended Equipment at a glance:
Plane: Sig Kadet LT-40 -- Great Instructions,easy to build, great flyer.
Engine: SuperTiger 45 -- Powerful, reliable, easy to set up.
Radio: A good 6 channel radio with dual rates such as the ones depicted above.


Return to RCMA Home Page

This page does not reflect the views of Collins Aerospace in any way.

For questions about this web page, contact:
RCMA webmaster


Last modified: